服务器上启动OG的DCF模块
- 前期配置工作
- DCF的启动
- 测试
- 修改代码
目录
1 前期配置工作
按照师兄《OpenGauss 编译环境配置、编译与安装》中的OpenGauss编译流程,分别在slave02-slave04上进行OpenGauss的编译。编译过程中值得注意的是,第三方软件需要修改环境变量,对/data/toolchain/binarylibs进行引用,而不要移动或拷贝这一文件夹。注意,以下操作需要在正确进行编译工作后进行。
本次参与集群构建的三台服务器地址与角色如下:
slave02(172.19.0.202): leader
slave03(172.19.0.203): follower
slave04(172.19.0.204): follower
如果新建终端,需要配置环境变量:
cd /home/lenyb/openGauss-server
source env.sh
分别在三台服务器上进行初始化,需要添加 -c 参数,以生成 dcf 相关文件,注意设置 nodename。
gs_initdb --nodename=gaussdb1 -w lamber@123456 -D /home/lenyb/opengauss/data/ -c
2 DCF模块的启动
2.1 配置DCF白名单
分别在slave02-slave04上打开 pg_hba.conf 配置文件:
vim /home/lenyb/opengauss/data/pg_hba.conf
在 postgresql.conf 最后面添加白名单:
host all all 172.19.0.202/32 trust
host all all 172.19.0.203/32 trust
host all all 172.19.0.204/32 trust

2.2 配置DCF参数
分别在slave02-slave04上打开 postgresql.conf 配置文件,因为在初始化时加了 -c,其中的 enable_dcf 参数会自动打开。
vim /home/lenyb/opengauss/data/postgresql.conf
在 172.19.0.202 下 postgresql.conf 的最后添加下列信息(全部使用英文符号):
port=21000
dcf_node_id = 1
dcf_ssl=off
dcf_data_path = ‘/home/lenyb/opengauss/data/dcf_data’
dcf_log_path= ‘/home/lenyb/opengauss/data/dcf_log’
dcf_config=’[{“stream_id”:1,”node_id”:1,”ip”:”172.19.0.202”,”port”:21000,”role”:”LEADER”},{“stream_id”:1,”node_id”:2,”ip”:”172.19.0.203”,”port”:21000,”role”:”FOLLOWER”},{“stream_id”:1,”node_id”:3,”ip”:”172.19.0.204”,”port”:21000,”role”:”FOLLOWER”}]’
replconninfo1 = ‘localhost=172.19.0.202 localport=21001 localheartbeatport=21005 localservice=21004 remotehost=172.19.0.203 remoteport=21001 remoteheartbeatport=21005 remoteservice=21004’
replconninfo2 = ‘localhost=172.19.0.202 localport=21001 localheartbeatport=21005 localservice=21004 remotehost=172.19.0.204 remoteport=21001 remoteheartbeatport=21005 remoteservice=21004’
在 172.19.0.203 下 postgresql.conf 的最后添加下列信息(全部使用英文符号):
port=21000
dcf_node_id = 2
dcf_ssl=off
dcf_data_path = ‘/home/lenyb/opengauss/data/dcf_data’
dcf_log_path= ‘/home/lenyb/opengauss/data/dcf_log’
dcf_config=’[{“stream_id”:1,”node_id”:1,”ip”:”172.19.0.202”,”port”:21000,”role”:”LEADER”},{“stream_id”:1,”node_id”:2,”ip”:”172.19.0.203”,”port”:21000,”role”:”FOLLOWER”},{“stream_id”:1,”node_id”:3,”ip”:”172.19.0.204”,”port”:21000,”role”:”FOLLOWER”}]’
replconninfo1 = ‘localhost=172.19.0.203 localport=21001 localheartbeatport=21005 localservice=21004 remotehost=172.19.0.202 remoteport=21001 remoteheartbeatport=21005 remoteservice=21004’
replconninfo2 = ‘localhost=172.19.0.203 localport=21001 localheartbeatport=21005 localservice=21004 remotehost=172.19.0.204 remoteport=21001 remoteheartbeatport=21005 remoteservice=21004’
在 172.19.0.204 下 postgresql.conf 的最后添加下列信息(全部使用英文符号):
port=21000
dcf_node_id = 3
dcf_ssl=off
dcf_data_path = ‘/home/lenyb/opengauss/data/dcf_data’
dcf_log_path= ‘/home/lenyb/opengauss/data/dcf_log’
dcf_config=’[{“stream_id”:1,”node_id”:1,”ip”:”172.19.0.202”,”port”:21000,”role”:”LEADER”},{“stream_id”:1,”node_id”:2,”ip”:”172.19.0.203”,”port”:21000,”role”:”FOLLOWER”},{“stream_id”:1,”node_id”:3,”ip”:”172.19.0.204”,”port”:21000,”role”:”FOLLOWER”}]’
replconninfo1 = ‘localhost=172.19.0.204 localport=21001 localheartbeatport=21005 localservice=21004 remotehost=172.19.0.202 remoteport=21001 remoteheartbeatport=21005 remoteservice=21004’
replconninfo2 = ‘localhost=172.19.0.204 localport=21001 localheartbeatport=21005 localservice=21004 remotehost=172.19.0.203 remoteport=21001 remoteheartbeatport=21005 remoteservice=21004’
2.3 启动集群
如果有正在运行的OG进程,需要先关闭:
gs_ctl stop -D /home/lenyb/opengauss/data
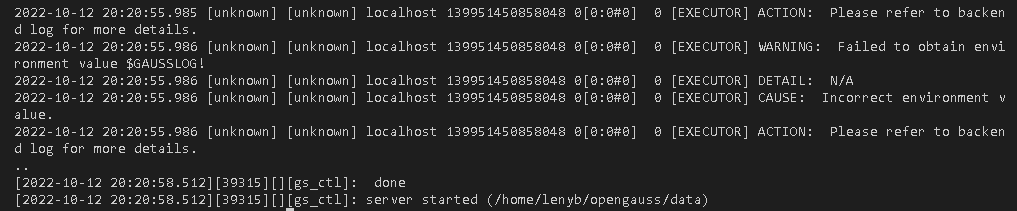
成功关闭OG进程后,将集群全部节点以standby的模式启动:
gs_ctl start -D /home/lenyb/opengauss/data -M standby
在主节点(leader)设置存活节点为少数派模式运行:
gs_ctl setrunmode -D /home/lenyb/opengauss/data -v 1 -x minority

然后,集群其他节点(folloer)主动重建拉起:
gs_ctl build -b full -D /home/lenyb/opengauss/data

最后,在主节点(leader)执行,使存活节点重回多数派(需要关闭防火墙):
gs_ctl setrunmode -D /home/lenyb/opengauss/data -x normal
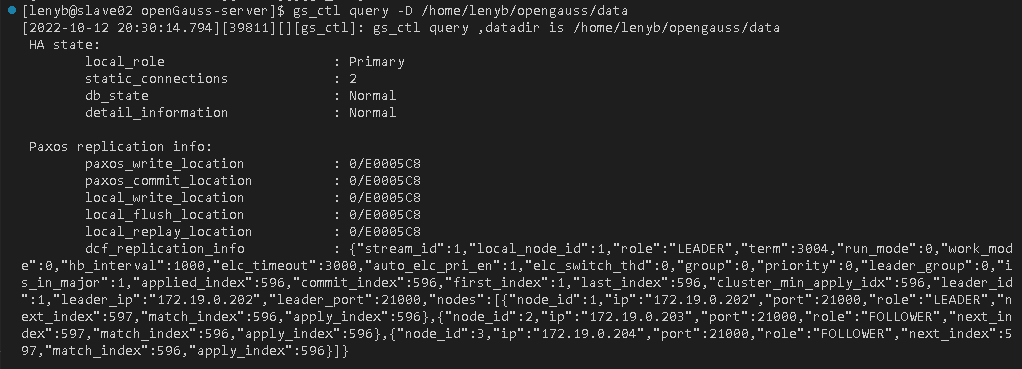
至此,集群启动完成,可以查看当前节点状态:
gs_ctl query -D /home/lenyb/opengauss/data

3 测试
当完成了集群的搭建后,下面做一些简单的测试。
3.1 数据同步测试
首先在主节点上连接数据库:
gsql -p 21000 postgres -r
创建 ysl 表,插入一条数据并查看:
create table ysl (id int);
insert into ysl values(1);
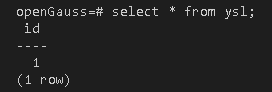
select * from ysl;
然后在从节点上分别连接数据库,并直接查询该表:
gsql -p 21000 postgres -r
select * from ysl;
结果与上图相同,数据同步成功。
3.2 节点异常测试
如上文所述,当前slave02(172.19.0.202)为leader节点,slave03(172.19.0.203)与slave04(172.19.0.204)为follower节点。此时,我们让主节点失效再重启,看集群如何处理异常。
首先,在slave02上停掉数据库进程:
gs_ctl stop -D /home/lenyb/opengauss/data

然后查看slave03状态:
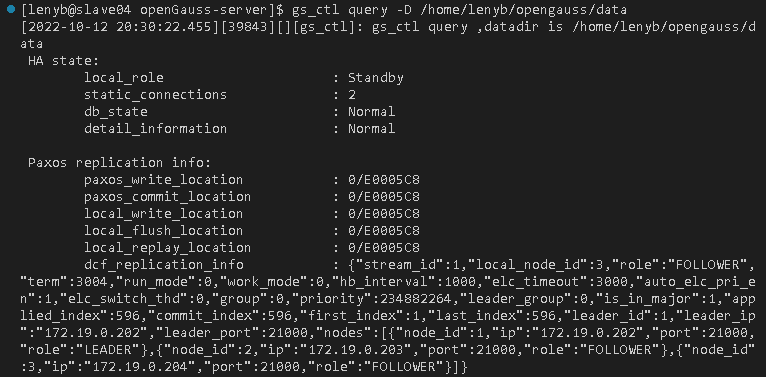
gs_ctl query -D /home/lenyb/opengauss/data
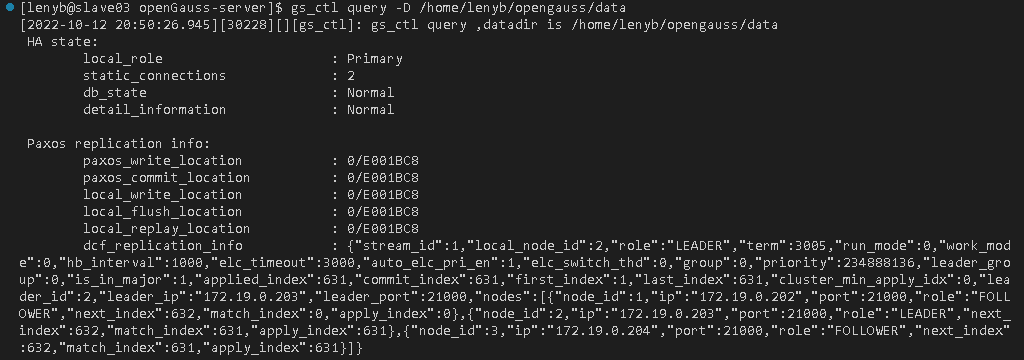
可见此时slave03的状态已经由standby变为primary,角色由follower变为leader。然后查看slave04状态:
gs_ctl query -D /home/lenyb/opengauss/data
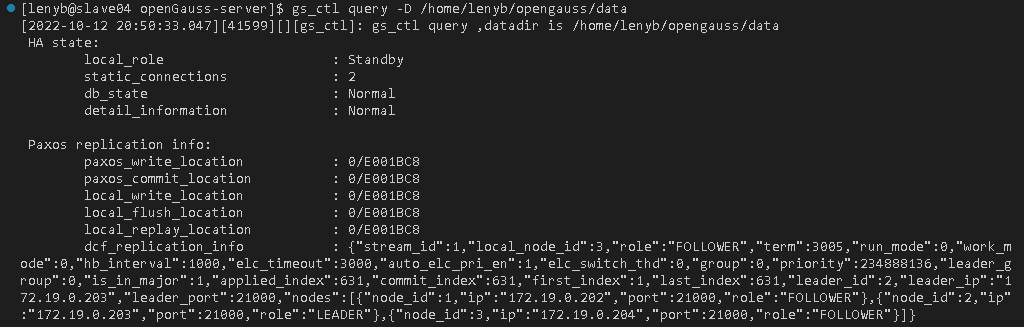
此时slave04的状态依然为standby,作为follower。是因为当slave03与slave04一段时间没有收到过集群leader的心跳消息后,发起了新一轮的leader竞选,slave03当选新一周期的leader节点。此时,将slave02重启,并查看节点状态:
gs_ctl start -D /home/lenyb/opengauss/data -M standby
gs_ctl query -D /home/lenyb/opengauss/data
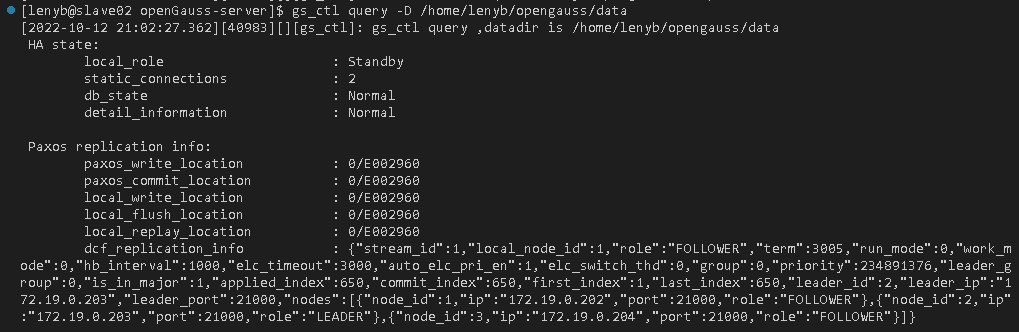
可见slave02重启后重新加入集群,并作为follower节点继续运行。如果进行switchover切换操作,那么slave02又会重新成为leader节点:
gs_ctl switchover -D /home/lenyb/opengauss/data
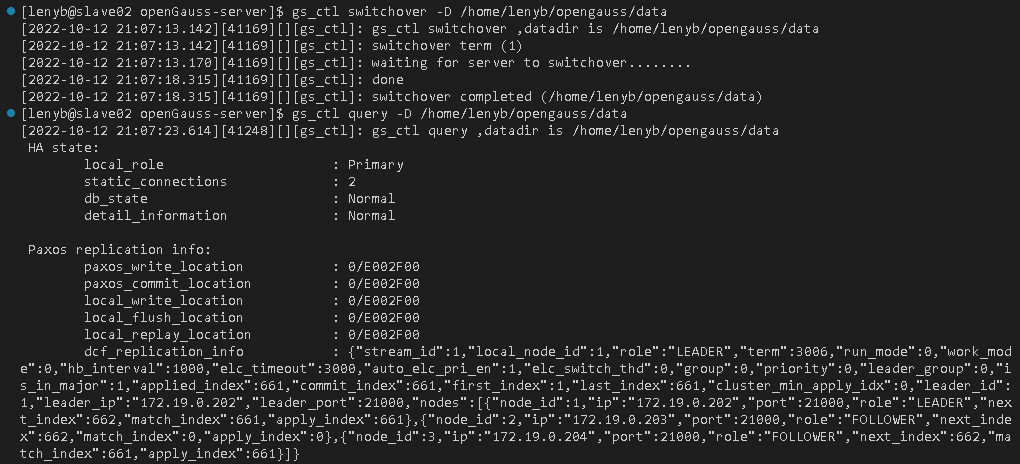
但此时,上一任主节点slave03会down掉,需要手动加入集群。
gs_ctl start -D /home/lenyb/opengauss/data -M standby
4 修改代码
如果想在集群成功搭建起来后对代码进行修改,需要重新编译运行,先删除opengauss文件:
rm -rf /home/lenyb/opengauss
然后配置编译版本、编译与安装:
./configure --gcc-version=7.3.0 CC=g++ CFLAGS=’-O0’ --prefix=$GAUSSHOME --3rd=$BINARYLIBS --enable-debug --enable-cassert --enable-thread-safety --with-readline --without-zlib
make -j`grep -c ^processor /proc/cpuinfo`
make install -j`grep -c ^processor /proc/cpuinfo`
然后在按上文所述的全部过程执行一遍。
服务器上启动OG的DCF模块